Halloween Decor Kit


I put this together a couple years ago as part of a Halloween swap at work. I still kind of wish I had kept it for myself:) It was pretty easy to put together since I already had some of the materials to work with. I had several crusty bottles left over from our wedding (you can find these at antique shops – I try to spend less than $2.50 a piece, but they can be priced much higher if they are in good condition – so stick with the dirty ones), and had a collection of solid and vintage fabric. The fabric pumpkins came from this tutorial and were fun to do. They are pretty easy, but it does take some hand strength to get the yarn nice and tight for the pumpkin indentions. I found the tapered candles at William Sonoma. They don’t have the exact ones from 2 years ago, but I think these ones are pretty similar. I had to cut them down (using a warm knife to cut the wax) and had to melt the ends a little to get them to fit and be stable in the 
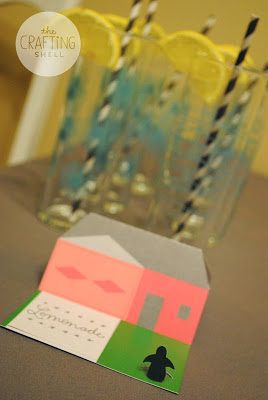
bottles. The crate box was found at an antique shop and the gravestone place cards were made using a laser cutter (you could cut them out of paper for a simpler option). I painted them with chalkboard paint so you can write/erase and reuse them each year. I quilted a little mini quilt as the runner, using fabric I already had and that was leftover from making the pumpkins.


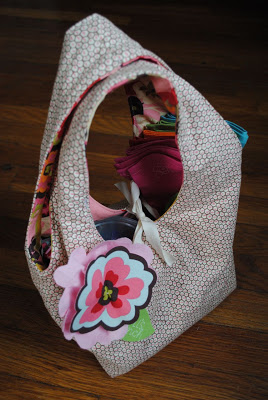
These are just a few ideas to make a cute holiday centerpiece for your table, or as a little Halloween kit for a friend. A few of the items could even work into Thanksgiving, depending on the fabrics you use.

A Scalene Right-Angled Triangle Quilt


Another baby quilt I made last year! You can make this one too. It's really easy and fast to cut out, and pretty easy to sew as long as you don't mind matching up a few points.

Below are a few test photos I took playing with different ways to lay out the triangles. Triangles are fun because they can create so many other shapes and designs just by the way you rearrange them. Since these are scalene (all unequal sides) triangles, it makes the quilt just slightly longer than wide.


The finished dimensions are about 36" x 45", but you could add more triangles to make it a bigger if needed. Cut a rectangle 10 1/8" x 12 5/8", and than cut the triangle in half diagonally. Repeat this step 16 times total, with half the triangles in navy (or another color) and the other half in brighter colors.

Hello Fall, Goodbye Summer (and CSA)


Like a lot of people, I love the fall - it’s one of my most favorite times of the year! As excited as I am for the cooler temps, all things pumpkin spice, and Halloween and Thanksgiving, I’m going to miss the unending fridge full of good food. I eat melon in the summer like a bear during salmon season! 

This was our second year of participating in CSA (Community Supported Agriculture). It was such a great learning experience and saved us from the weekly dread of figuring out what meals to make and what to purchase from the grocery store. We tried and made lots of new things. Some of our favorites – baby bok choy, eggplant parmesan, coleslaw, kale chips and veggie stews. We tried beets for the first time, and several new recipes. It was like a food adventure in our kitchen, and a great project to work on together as a couple. 

I would highly recommend joining a CSA next year! We got a variety of fruits, veggies, canned goods, eggs and cheese, meat, bread (about 9 items a week) – and it was all local and fresh. I didn’t think I liked melons until joining CSA. There’s such a difference between a fresh/ripe cantaloupe, and one that’s not. So you get wonderful and healthy foods, and you support your local farmers:)

Lettered Envelopes

I've discovered a new way to letter envelopes! Well, I'm sure this has been done for many decades, but it's new to me! 

I have become very computer dependent when it comes to lettering which makes it very difficult to write on envelopes. I make it even worse for myself because I get so tense knowing that it's for a special occasion, and inevitably I start writing down hill, or I make a mistake:( I cannot write in a straight line!

So, with this new technique I can letter on a large sheet of paper (plenty of room to letter it a few times) and than cut it down to size. This also works great if the envelope paper isn't suitable for the medium your lettering in (watercolor, pen & ink, etc). I make a cut in each corner - making sure to cut through just one layer of paper - and than slide the lettered sheet into the corners. This wouldn't hold up through the mail system, so hand delivery is best - perfect for a wedding!


We love this wedding card - I think this is the third or fourth time we have given it:)

The Colorado Quilt

UPDATE: You can now purchase my Welcome to Colorful Colorado quilt pattern on Craftsy!


This quilt was Jesse’s 30th birthday present, and it was quite the process. Last year Jesse won a very large stack of Oakshott cotton at a Kansas City Modern Quilt Guild event that I brought him along to, and he very graciously gave it to me! I knew I had to make something for him with it, so the fabric was the first decision I made in making this quilt. I decided on Colorado for the theme, since he was born and raised there, and chose to use lots of graphic shapes for the pattern.

I started in June, giving me plenty of time to finish it. I didn’t want him to know that I was making it, so the only time I could work on it was when he wasn’t around. Fortunately, I found a few hours here and there each week. But, boy, that was stressful! I never want to have to quilt in secret again:)


The Oakshott fabric (oh my goodness, I love this fabric!) came in fat eighths, which definitely added complexity and time to the quilt. It all worked out in the end, but having fat quarters would have helped tremendously - not that I can complain, it was free after all. I drew everything in Illustrator, figured out the sizes, and also assigned every piece to a color since I was limited on fabric. My brain got a total workout on this one!


The quilt works both vertically and horizontally. Vertically, it’s like your standing in a field, looking at the sun setting behind the mountains. The large brown piece on the right represents the flat irons, which are located in the Boulder area where he grew up. If you hold it horizontally, it reflects the map of Colorado. Jesse actually taught me this, but Colorado is divided into thirds, with the mesas on the west (the reds) the mountains in the middle (blues are rock, white is snow, and green is the trees) and the plains (yellows, greens and browns) on the east.


I decided to name the quilt “Welcome to Colorful Colorado”. It only seemed fitting - a colorful quilt to represent the state’s motto. I used freezer paper and fabric paint to do the label on the back, and a facing finish binding to complete the quilt. 


I gave him his quilt last weekend, and he loved it! He’s so excited to have a quilt all his own.

Baby Quilt

This past year was full of several of my friends having babies. I guess I am at that age where people start to procreate – even though I still don’t feel old enough to take care of another human being!

The fun part of friends having babies (besides the cute babies) is getting to make quilts for them. Baby quilts are the perfect size to make. Anything bigger just seems unmanageable and way too time consuming.


One of my favorites I finished was for my good friend Jenn’s baby girl. Jenn and her husband have a very modern design aesthetic and picked lots of bright colors for the nursery, which made it even more fun to make! I used solids, and free-motion quilting that added a lot of texture. I used this fabric on the back, which helped inspire the quilt too. A lot of people thought it looked like the Trivial Pursuit game piece, or a game spinner – not intentional, but it would be really fun to do game inspired quilts in the future!


I was so excited to see her monthly photos taken on the quilt. Isn’t their baby girl adorable?! She’s even bigger now and almost 7 months old!

DIY Cardboard Hexagon Containers

We somehow ended up with loads of cardboard in our house. It probably helps that I won’t let Jesse throw ANY boxes away! We had several pieces in really good condition, so I decided to play around with turning some of it into little hexagon containers. I was able to use up some of the cardboard stash, and also found another use for my beloved washi tape.


The great things about these is that when you get tired of them you can just toss them in the recycling bin, and you don’t have to feel guilty about it. Even better, these only took about an hour to make. One hour = three very functional, and free, recycled hexagon containers – not bad!

Supplies: Cardboard, Washi Tape (I purchased some of mine from Happy Tape), pencil, x-acto, cutting mat, ruler and hex template.


Instructions & Tips:
1. Layout your template so that the top line is running parallel with the grain. This seems to make it a little more stable, and less likely to warp while wrapping the tape.
2. Don’t forget to mark your score lines! A clear quilting ruler works well for lining up your score marks and making a straight score line. Though, any ruler will do.
3. Score, cut out and fold. Use a “stabilizer” piece of tape in the inside to join the seam of your two end pieces. This will help hold the sides together while you wrap the container. 
4. Tape the sides to the bottom before you start wrapping the container. Wider tape works best for this part, as you’ll stick it to the side, and than fold it over to the bottom to attach the two.
5. Start wrapping! It helps to always start and stop on the same side, that way all your tape seams will all be one side.

I’ve included templates you can download for the three containers, and a bonus XLARGE version that is great as a gift box or for larger items.


They can even be found in nature – how cool is that?! Yep, I love hexagons.

LA

This past February I was able to go out to LA and visit my long time friend Jessie. We have been friends for our entire life, yes, all 29 years! We went to the same daycare as small children, and shared many classes over the course of twelve grades at the same school. Somehow we even made it through 4 years of French together, we’re still not sure how that happened! And please, don’t ask us to parler francais:)

I had such an amazing time. Jessie was kind enough to drive me around the town, which if you’ve ever been to LA, is no small feat. Some of my favorite things were Melrose Trading Post, touring Paramount Pictures (and the sets of Glee!) and watching the entire first season of American Horror Story together. If Netflix had been around while we were in high school, it is highly likely we would have done this!


We visited the shop Poketo, which I had seen online and knew I had to visit. The shop was amazing, just as I expected and the neighborhood was really cute too – an up-and-coming area with fun graffiti and a few other shops and restaurants. It seemed like an area straight out of the show New Girl, and I was right! The exterior shots of their apartment building is located just blocks away from Poketo. If you’re in LA, you should definitely venture to this part of town! 

Peace Quilt

I made this quilt for my mother-in-law back in April. I actually made it in a record 3 days! Eek! It helped that it was a simple design, plus I was highly motivated and didn't leave the house for an entire weekend. Sometimes this is the only way things will get done. I took these photos before I added the binding, but these photos have the best lighting.


I've been trying out piecing letters, and love the way you can incorporate words and phrases into a quilt. I think I actually used paper piecing this time for the letters which worked out well, and was fast too!

For the past several years they have been staying on a beach near Santa Barbara for a couple of months out of the year, so I used that as the inspiration. I used some Oakshott fabric I won last year which is such wonderful fabric and so perfect for this quilt. The threads are dyed and then woven together. In several of the fabrics they combine two colors, which give it an iridescent feel - so pretty:)


I left in the background on these because I just learned the best way to photograph a quilt is by hanging it on the wall. Duh, saves you from risking falling off a chair, or dropping your camera - and the quilt won't look warped from the weird angle. These is the last quilt to get photographed like this - thank goodness!

Public Bikes Box: Marquee Arrow Sign

At the beginning of the year I decided to take the plunge and purchase a bike. That whole process requires another post, but 6 months later, I am still very much happy with my decision!

Public is based out of San Francisco, so I had to have the bike shipped to me. So, not only did I get a beautiful bike, but a giant box as well. I'm all about reusing material, and the box/website even promotes recycling the box for something new - so awesome!

There are several good tutorials out there (here and here) for creating marquee signs out of paper mache letters and other materials. I ended up just figuring it out as I went along since I had certain restrictions due to the original box.


I decided on a giant arrow. I had to work around the handle cut outs on the box, and a few areas that got beat up in the shipping process. After cutting out the arrow shape, I used buttons to lay out where the lightbulbs would be. I decided on two strands (25 bulbs per strand) which fit perfectly on the arrow. I traced around the buttons, and than used those marks to drill holes (you could probably make cuts with your x-acto, but I really wanted to use power tools!).


I used the sides of the box for the sides of the arrow, and used lots and lots of hot glue to attach them. It's overall pretty lightweight, so I think it should hold up ok.


The finished light! I might eventually spray paint it, but I like the fact that it's imperfect and I even like the cardboard feel. Once we figure out the perfect place for it we'll hang it onto the wall, but for now it adds a little personality to our movie room and the perfect addition for a Movie Foodie night!

International Quilt Study Center & Museum

Last month I went to the International Quilt Study Center & Museum in Lincoln, Nebraska to celebrate my mom's birthday. We had talked about going for some time now, and finally planned the trip! She brought along two of her good friends, and we turned it into a little weekend trip.


They had a display of miniature and toy sewing machines - I desperately want that blue one at the top!


The quilt below was made by a seamstress in Lincoln. She made it between 1909 and 1914, and is made of 10,222 pieces! And those pieces are tiny too! I can see why it took her 5 years to complete:)


A guy pieced and quilted this one above! He was an engineer, and used his math skills to perfect quilting.


They have a collection of over 4,000 quilts, but they only show a couple dozen at a time, and rotate the quilts in themed exhibits. I loved that it was just three curated little exhibits. Most museums have so much art to look at, it can be overwhelming, and I tend to get bored - but this had just the right amount. You could go once a year and see different quilts, and hear different stories every time.

One lesson I learned after visiting - label your quilts with your name and year! I have only done this once, but will try to be more diligent about it in the future. You can check out their website to see their current and future exhibits, and also see images of their quilt collection.

Movie Foodie: Edward Scissorhands


Edward Scissorhands has been one of my favorite movies. It was also one of my favorites to host as Movie Foodie night - and the one I spent the most time crafting for. I couldn't resist making mini sherbet houses and my very own patchwork scottie dog! The scottie dog pattern is from Denyse Schmidt, and you can find it here.


Food items were: Scissorhand kabobs (grilled peppers, potatoes and zucchini), Ambrosia salad, heart shaped sugar cookies, and lemonade. The food is always served first, which allows the guests to discover the scene for each food item as we watch the movie.


I'm including the templates for the sherbet houses, and Edward's paper chain. You can use the the houses as place cards for your food items, or to create a colorful little suburban village:) Click here for the templates!

Quilted Pillows


Last winter I made several pillows for friends. Turns out quilting/sewing in small sizes is a lot more fun and a lot less time consuming! This was also my first time trying improvisational piecing - and I loved it! I can spend so much time planning a quilt out, and doubting my decisions, but with improv you just have to go with the flow. I also incorporated lettering into the quilting, because I love putting quotes on things. My favorite: "Just think lovely, wonderful thoughts" - thanks J.M. Barrie (Peter Pan).

Movie Foodie!

My desire to have a Movie Foodie night all stemmed from the fabulous movie, Benny & Joon. I watched this movie with my friends in college more often that I'd like to admit. One of the best scenes, by far, is where Johnny Depp's character, Sam, is ironing grilled cheese sandwiches with an iron (why so many sandwiches, I will never know...) Since the first time I saw this movie, I have wanted to try it out, but for some reason never have. It seemed like the perfect food adventure to try with friends - so maybe a girl's night? My right brain started to take over, and than I had a whole evening planned full of other movie related food items. Movie Foodie night became the perfect excuse to plan a themed, social event (my desire to behave like a hermit only intensifies as I age, and planning specific events helps prevent total hibernation).

I decided on three movies that I enjoy and could easily relate to food. I didn't have to try hard to come up with "menus" for each night. The three movies* and their featured food item: Benny & Joon (ironed cheese sandwiches, of course), Mermaids (marshmallow kabobs) and Edward Scissorhands (ambrosia salad). There are about 3-4 other appetizers per movie, and a few decorative details that relate to the film.

And last night, was the first Movie Foodie night! I'll share more photos soon of the actual evening...

*If you are interested in these movies, and subscribe to NetFlix, all are currently streaming on their website.

Happy Valentine's Day!


We had a Valentine swap at work today, so I made these little guys to share with everyone! I can't take any credit for the format, as they are based off these awesome Japanese monster cubes. I made a few changes to the template, making it bigger, and used my minimal illustration skills to make a cupid. There's even space for some candy inside his mouth. With the whole set of them, they kind of look like cupid robots!

Napkins + White Gel Pen


I had started these by doing embroidery, and quickly realized it wasn't going to work out. 1: it was going to take WAY too long and 2. the back of the embroidery would easily show, and it did not look pretty. I than remembered the gel pens (I used a Sakura Gelly Roll pen) are permanent and also easy to work with. You can also achieve more detail, especially when working small.

I had to draw somewhat slowly to make sure the line of ink wasn't breaking up, but it was much quicker than the stitching. After you draw your artwork, heat set the ink with an iron. After that it can be washed and dried and the ink will stay in place.


Lunch Tote

Even though I was busy with other projects, I couldn't resist participating in my friend's Easter swap. I join in on projects hoping that it will somehow force me to do the things I've been wanting to do. And it worked! I had been wanting to make a lunch tote for myself (I'm a big proponent of bringing your lunch to work) and thought a lunch tote would be the perfect "basket" for a swap. I bought cloth napkins (something I had also been wanting for awhile) at Bed Bath & Beyond (12 napkins, in 6 colors for $10) and used a white jelly roll pen to spruce them up a little (the ink won't wash out). I also added a glass jar from Fishs Eddy, a sandwich container and some candy.

The most important feature I wanted the lunch tote to have was a large flat bottom - so my containers wouldn't tip over. I ended up finding two patterns out the internet and combined them. The top portion is from here, and the bottom portion is from here. There is a layer of cotton batting, and because of the way it's sewn together, it's also reversible.


I used the fabric from the "inside" to create the flower on the outside of the tote. I cut out one of the flowers in the print, and fused some fabric on the back (to add weight and stability). I ran some thread through the middle to add more dimension and also cut a flower shape out of plain fabric to add more depth and layers. I attached it to a pin back, so she can easily remove it. I used a white jelly roll pen to write her name on it. I'm sure labeling your lunch isn't as important as it was in grade school, but it seemed like a fun element to add.


I now have my own lunch tote (an owl print that is somewhat grade school-esque) and I just sent off one for my mom as a belated Mother's Day gift!

Cat Nip

It seems everyone in my life has gotten a cat(s) recently, or already had them. I cannot wait for the day that I will have one or two of my own, but until than I will treat other cats as my own. I had been wanting to make cat nip toys, so my mom purchased some from her food co-op. The only downside is it comes in large quantities, and now I have a big ass bag full of cat nip (see photo below).

Now I am on a mission to come up with some clever cat nip toys I can give to my friends and family. The first toys I made were inspired by my good friend's cat Nimbus (because he looks like a fluffy gray cloud) and so I made nimbus cloud cat nip toys. He destroyed them within 24 hours, but he enjoyed them, and that's all the matters.


I had a co-worker give me some leftover fabric that was perfect for the nimbus clouds, so I gave a set to her cats as well. Spreading the cat nip love!

American Girl doll outfit

For my niece's 5th birthday, she got to pick out an American Girl Doll. My sister and her family came down to go to the new store, and the three of us (the boys stayed at the hotel) went shopping! My obsession with these dolls has not stopped since becoming an adult, and I tried my hardest to pursue my niece to pick out Kit (check out that doll's clothes and kitchen set - they're awesome!), but in the end she picked out a My American Girl doll (that happened to look just like the Molly doll) and named her Molly.

I still remember when Santa brought me my very own AG Molly doll! She lives at my parent's home (seems too creepy to be 27 and have her in my apartment) and I used her in a photo shoot to capture the doll outfit I made for my niece's birthday. She's still in pretty good condition - though her hair could use a deep hair conditioning treatment.


I used this pattern from Mod Kid, and used fabrics from JoAnn's. Normally I don't purchase fabric from there, because the quality is cheaper and the fabric isn't as cute - but I happened to find this adorable print that was perfect for the doll outfit. Sewing tiny outfits does have it's downsides, but they are so much fun to work on and are so cute when finished!

Baby Shower Invites

The same baby shower that I made the quilt for, I also did invites. After completing them, I realized I could have created a much simpler version, but such is the downside of being creative. We aren't always practical. I made garland for it too (pictured below) which unfortunately we didn't end up using, but fortunately for me I kept it and hung it up in my bedroom - an easy way to brighten up an apartment bedroom.


It was a book themed baby shower, so I used a book-fold format for the invite (so obvious, I know) hoping it would have the feel of an actual book. I also included a removal book plate (printed on sheets of sticky label paper). I got the idea for the book plate addition from here. Everyone bought a book for the new baby girl, and this seemed like a good way for everyone to personalize them.


If you are thinking about hosting a book themed baby shower, you must check out this one created by the people at Martha Stewart. Amazing! And it even comes with free downloads!